Python + VS Code Installation and Setup Guide (Windows) — 1
Table of Contents
Next Article:
Python + VS Code Installation and Setup Guide (Windows) — 2
Notes before Start:
These 2 articles are about installing and setting up Python and Visual Studi Code on Windows.
- By the end of this article, you will be able to run a simple Python program on both Command Prompt and Python IDLE.
- By the end of the next article, you will be able to run a simple Python program on VS code.
- The instructions should work for any version of Python and VS Code.
- You can always skip the Explanations and “Q(Questions)” sections in this article.
Alternative Choices at Some Steps
I will use Steps 1, 2, 3 in the following instructions, but there are some steps that involve alternative choices. For example, for step 2, you can choose “2. (Directly Download)” or “2. (Specific Version)”.

Some related questions answered in this article:
- How to know your Windows is running a 32-bit or 64-bit version?
- Which one should you download: 32-bit or 64-bit version of Python?
- What are Environment Variables in Windows?
- Why do we need to check “Add Python 3.x to PATH”?
Download Python
1. Go to the website: https://www.python.org/. Click the “Downloads” button.
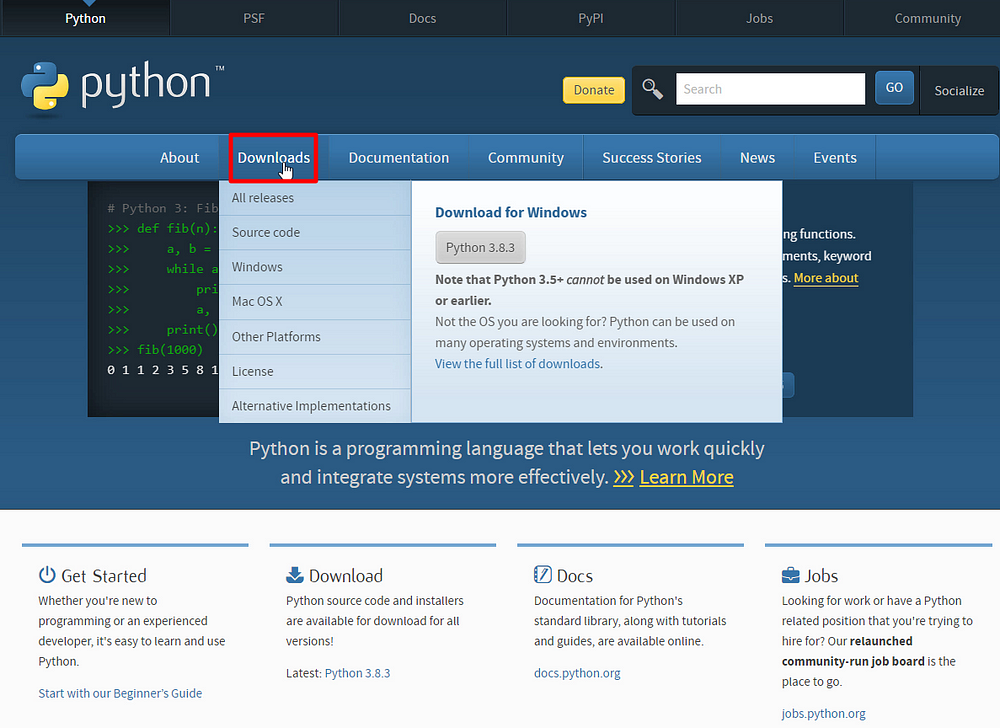
2. (Directly Download) You can click the “Download Python 3.x” button directly. However, if you need to download a specific version of Python, you need to scroll down the page.

Q: Why do you need a specific version of Python?
- The newest version may not be compatible with some libraries. It means that the application you are developing may have version dependencies.
2. (Specific Version-1): Scroll down the page and select the version you are looking for.
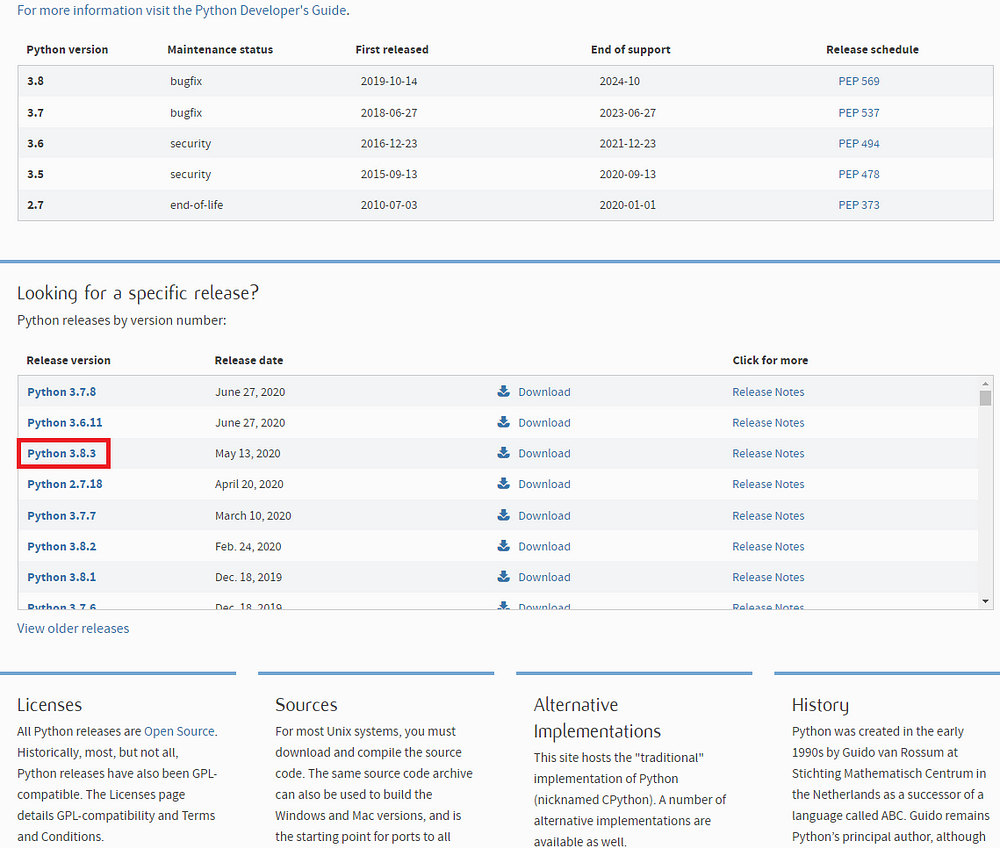
2. (Specific Version-2) Scroll down again, and you will see the “Files” section.
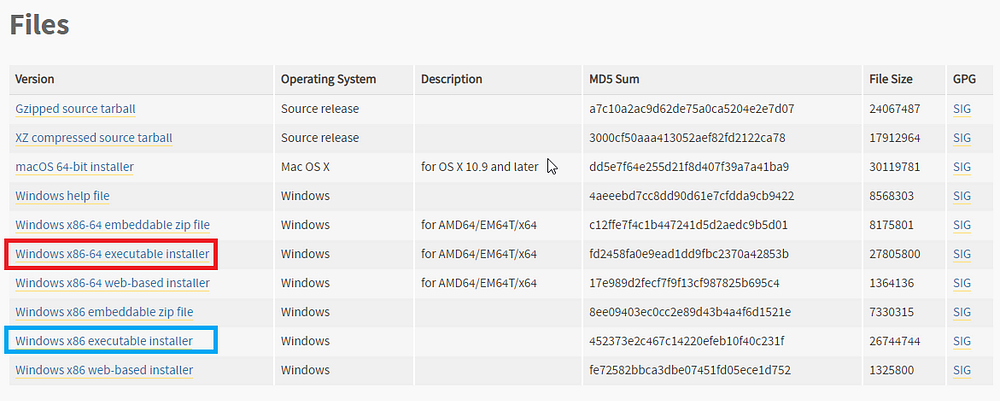
Explanations — Python Installer:
You can see there are 3 types of Python installer for Windows here:
- embeddable zip file: can be put into an application written in Python for distribution purpose (More details can be found: https://docs.python.org/3.5/using/windows.html#embedded-distribution)
- executable installer: a .exe file, the most commonly used installer.
- web-based installer: smaller installer, download the necessary components and install automatically, requires a network connection.
- x86–64: 64 bits
- x86: 32bits
Q: How to know your Windows is running a 32-bit or 64-bit version?
Most machines are running a 64-bit operating system nowadays. If you are not sure about your Windows, type “About your PC” in the lower-left search box. Click and look for the “System type.” You should see your computer’s info there.
Q: Download 32-bit or 64-bit version?
- 64-bit version of Windows can usually run 32-bit Python nowadays.
- If your computer is running a 64–bit operating system, you should better choose “x86–64”. People might say the 32-bit version is more stable. However, the 64-bit version allows your program to access more RAM than the 32-bit version. Also, some machine learning libraries only support the 64-bit version (e.g., TensorFlow).
Install Python
3. After you choose the right version, you can select the corresponding “executable installer” and download. You should see the following when you open the installer:
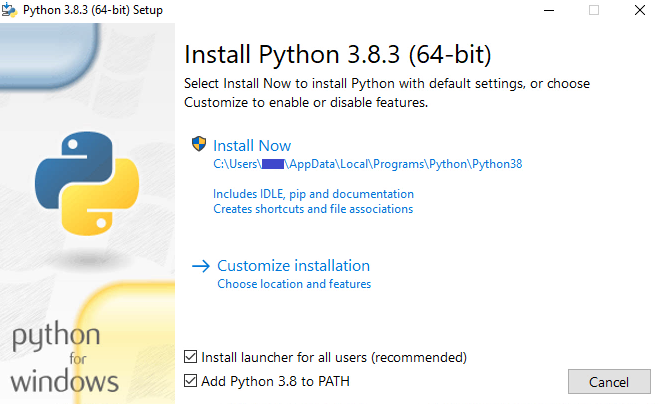
4. Make sure you check the box “Add Python 3.x to PATH” first. I will explain why this is necessary later.
5. (Install Now-1) (Not Recommended) If you are Okay with the installation path (user directory), you can click the “Install Now.” You don’t need to be the admin to do this option.
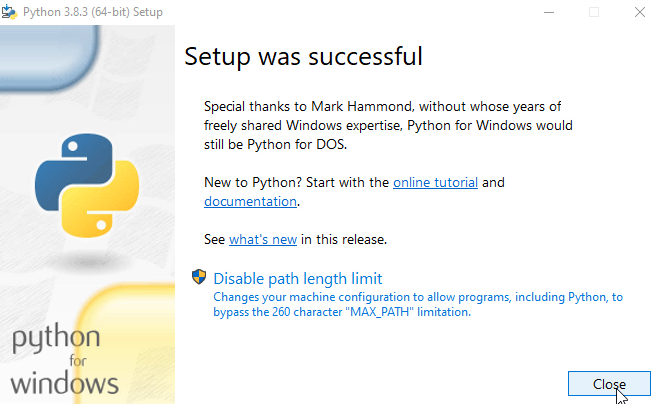
5. (Install Now-2)
You should see this window after clicking “Install Now.” You can click “Close” here.
5. (Customize-1) (Recommended) You should see the following window if you clicked on the “Customize Installation.” This might require you to have administrative credentials or approval.
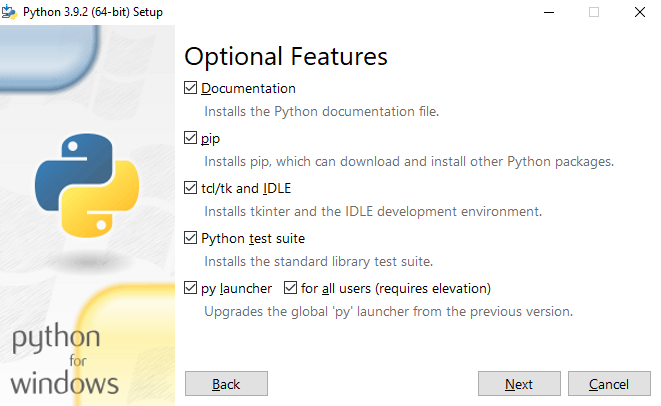
5. (Customize-2) Leave it as default and click “Next.”
5. (Customize-3) You should see the following window. We want to change the install location here.
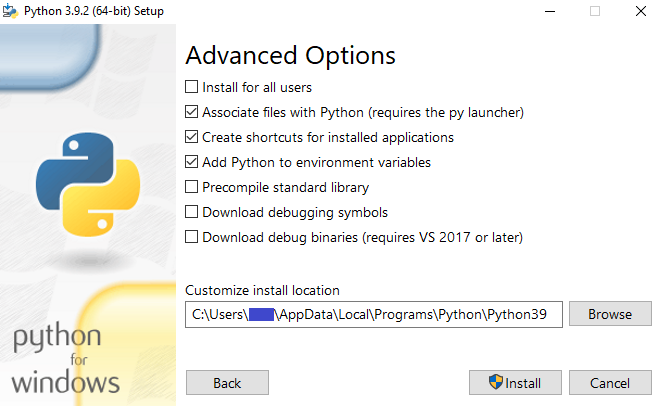
5. (Customize-4) Change the path to “C:\Python\Python39” (Change Python39 to the version you are downloading, 3.8.3 → Python383).
If you want to check the “Install for all users,” you can check the first box. This will also check the “Precompile standard library” automatically. This has little effect; leaving it unchecked is recommended if you don’t know the meaning.
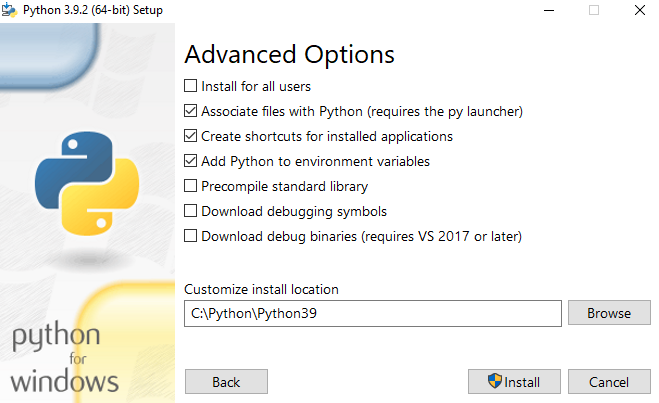
For the bottom three checkboxes, leave it unchecked if you don’t know the meaning.
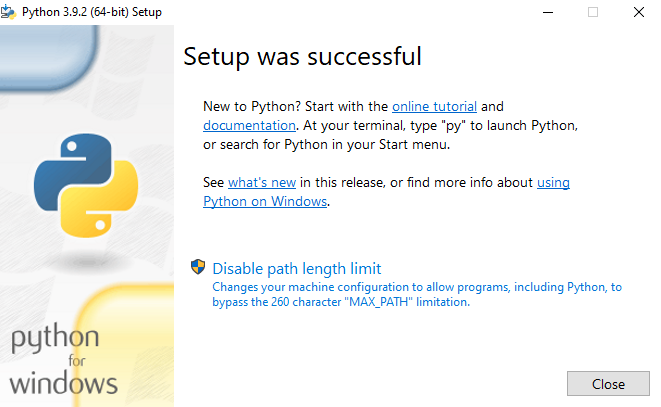
5. (Customize-5) Click “Install,” and you will see the following. You can click “Close” here.
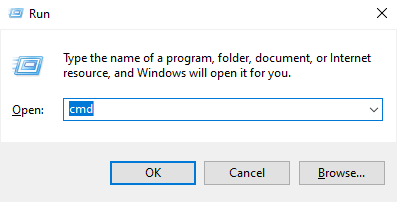
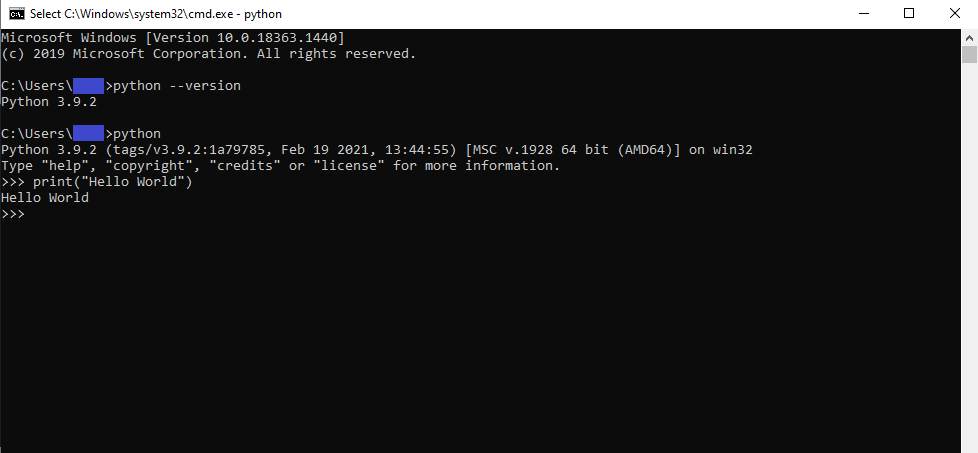
6. Now, let’s check whether the python was installed correctly. Open your command prompt. (Press Windows+R, type “cmd” and then click “OK”)
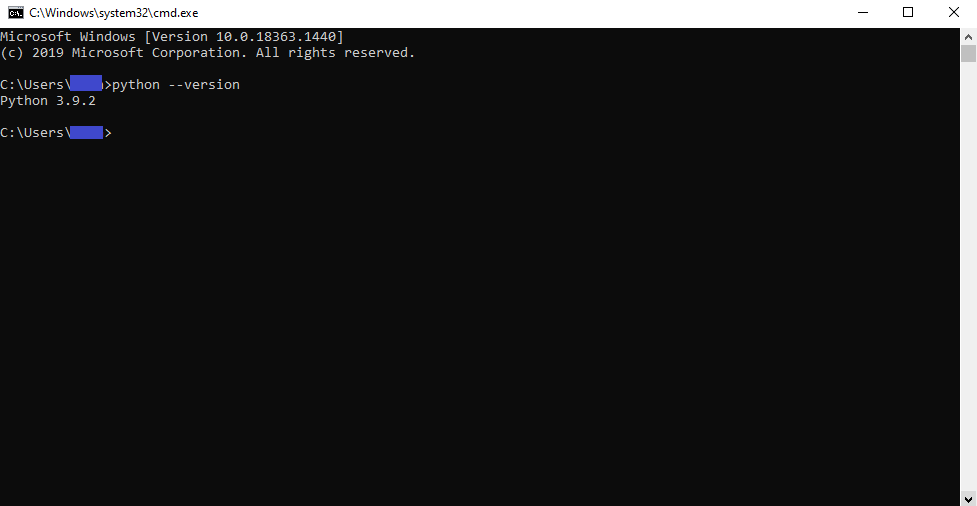
7. Type “python --version” and press Enter. You should see the corresponding python version.
8. Type python and press Enter. You can also write some simple python codes here like “print(“Hello World”)”
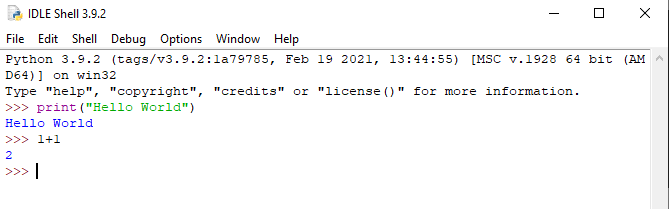
9. If you press the Windows button, you should see there will be “IDLE (Python 3.9 64-bit)” under the “Recently added”

10. Click and open it. You will find that you can also write python code here.
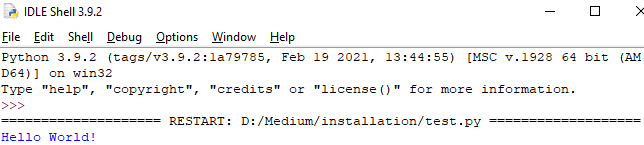
11. Also, you can click the “File,” open “New File,” and write the following code.

12. Then press Ctrl+s for save, and click “Run” → “Run Module.”
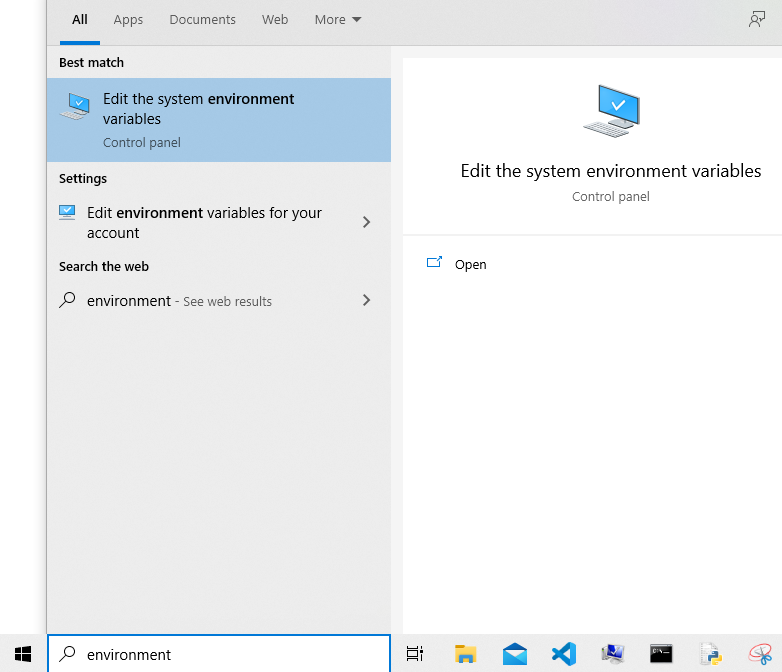
Q: Why do we need to check "Add Python 3.x to PATH"?
To understand this, we first need to know what is the “Environment Variables.”
Type “environment variables” in the search box and open the “Edit the system environment variables.”
You should see the “System Properties.”
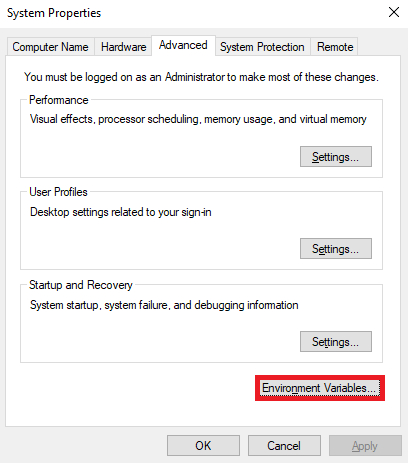
Click on the “Environment Variables,” and you should see two Path variables under the User variables and System variables.
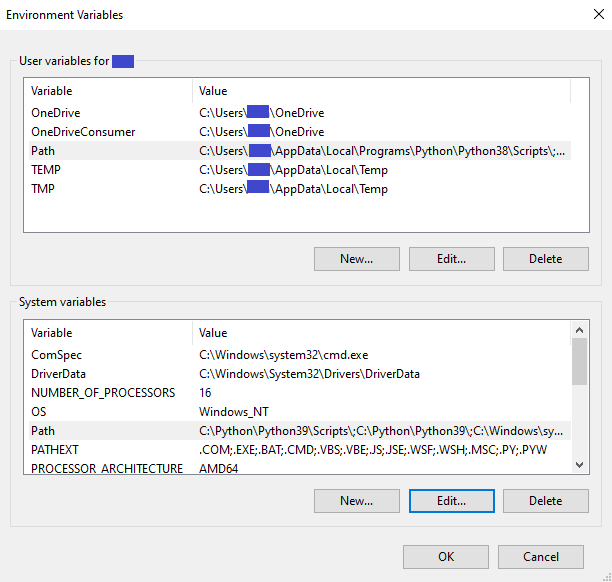
If you chose “Install for all users,” double-click the “Path” under the System variables. If not, then double-click the “Path” under the user variables.
You should see these two paths.

If you open the folder, you will see that there is a python EXE file.
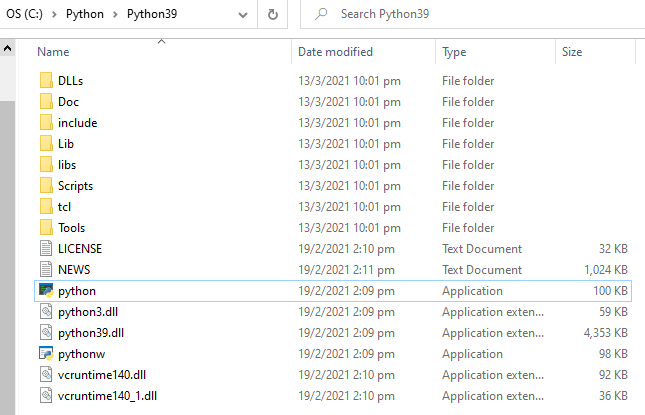
Basically, when you type “python” in the command prompt, it goes to the Path to find the .exe file named “python” and run it. You can change the file name and tried type “python” again in the command prompt. You will find that it does not work anymore.
Next Article:
Python + VS Code Installation and Setup Guide (Windows) — 2
I hope this article helps you!

Ranblog Newsletter
Join the newsletter to receive the latest updates in your inbox.
